Monday, October 22, 2012

Tis the season

Hello friends! As I spend the day on the couch sick I thought I would take the time to share with you all something I came across in the  Taste of Home's Best Holiday Recipes 2012 magazine.  I picked it up this past week at the grocery store and on one of the first few pages I found this and thought it was too good not to share. Very appropriate for the coming holiday season, although any of these things could and SHOULD be done all year long! I will be cutting it out of the magazine and hanging it to my fridge.

The ABCs of Giving

A Ask someone to lunch at your house.
B Bake a special treat for an elderly acquaintance.
C Call and old friend who's been out of touch.
D Deliver groceries or medicine to a shut-in.
E Encourage someone who's having a bad day.
F Fix your family's favorite meal.
G Give outgrown toys and clothing to charity.
H Hug a friend; tell her why she's special to you.
I Invite a friend over for coffee and conversation.
J Just do it- when you see a need, try and fill it.
K Kneel down and pray for your family, friends, and government leaders.
L Lend a favorite book or movie to someone who'd enjoy it.
M Make a collage of photos in someones honor.
N Nominate a deserving student, teacher, waitress, or other worker for an award.
O Offer to organize someones recipes, junk drawer, or closet.
P Pick up flowers for someone in the hospital.
Q Quench a co workers thirst- treat them to a big thermos of hot cocoa.
R Read nostalgic poems and stories at a retirement center or nursing home.
S Send greeting cards to friends and family making birthdays, anniversaries, and more.
T Take a walk with a friend.
U Use every opportunity to find and deliver sincere compliments.
V Volunteer at a soup kitchen or food pantry.
W Write that long overdue letter or chatty email.
X Exemplify extra effort in caring and sharing.
Y Yield the choice of movie, restaurant or book club selection to someone else.
Z Zip through your day with a mile for all you meet.


Sunday, September 16, 2012

Things I've been loving

I realize I haven't done a "Things I've been loving" post lately... or really any post at all! So I thought I would share a couple of things that well...I have been loving. Both are things I would  not have expected to show up in a post entitled things I've been loving, but they have so here they are!

Vitabath Body wash in Grapefruit Vanilla
Whenever I see Vitabath I think of my Grandma...  I always remember seeing a big bottle of Vitabath (think the original spring green) on her bathtub. I never thought of using it myself and then one day I was perusing Ulta and noticed they make more than just that particular scent....hmmmm....still I didn't think of buying it.  However as I walked past I noticed a few important words SULFATE & PARABEN FREE... OK Now it had my attention.  We are hearing sulfates are not good for our hair and parabens are not good for us in general so I've been trying to stay away from both as much as I can. In all honesty body wash is body wash in my book, but the smell of this is so head over heels yummy and the fact that it's sulfate and paraben free makes it a winner.  They have other scents I love too, but this is my fave.

Wen Cleansing Conditioner in Sweet Almond Mint
I've watched infomercial after infomercial on this stuff and I can't tell you how many times I've almost ordered it off of QVC.  But, I don't because why would you wash your hair with conditioner???  To me that just doesn't make sense. I didn't think it could 'clean' the hair. Well, my mom bought into the hype (she always does with anything beauty related and lucky for me she always shares)  She told me to take some home and try and I thought ok, I have been curious and figured I would just use it on a day that I didn't really mind if it didn't work as it claimed. Was I pleasantly surprised with the results! My hair really did feel clean after I used it and it looked really nice and shiny. I haven't been using it long enough to see if it will be a must have product but I am loving it right now!

That's all for now. What products are you loving?


*Disclaimer: I have not been paid or compensated otherwise to write this. These are my honest thoughts and opinions about the products and wanted to share them with you because I enjoy them and think you would too.

Wednesday, August 22, 2012

FLIPPITY FLOPS

My daughter and I have been making these flip flops this summer. They are super cute and something different to accessorize her outfits.  The only down side is they don't hold up well when she's running wild playing outside. But that's ok because they are so simple and cheap to make! And with all the different ribbons out there the designs are endless! 


You will need:
A pair of flip flops, 2 different ribbons (the 15' rolls work great)
scissors, ruler, lighter (optional)
 
Cut the ribbon in 6" lengths.
You can then heat treat the ends with the lighter if you'd like.
 
Tie and double knot the ribbon on the straps
of the flip flops, alternating ribbons.
 
How cute are these?!
 
Happy crafting!

Monday, August 20, 2012

BUSY BUSY BUSY

Hello friends! I apologize for being MIA.It's been a busy summer. I'm hoping to get back to blogging soon.  Hope everyone is enjoying their summer. I'm looking forward to Fall!! Are you?

Sunday, July 22, 2012

Red Velvet Shake

As I've mentioned before I love me some red velvet so when I came across this recipe I couldn't wait to try it.  The original recipe comes from Hungry Girl (love her) so it's very figure friendly.  I did modify it a little so it's probably not as low fat/cal as Hungry Girl's, but it's still a healthier option than a regular red velvet milkshake would be. It turned out to be super yummy and surprisingly filling. Even the hubs said so!

Red Velvet Milkshake

What you need:
1 packet diet hot cocoa mix  (20 - 25 calories)
1 tbsp. French vanilla powdered creamer
1 tsp. mini semi-sweet chocolate chips plus additional for garnish if desired.
4 drops red food coloring (optional)
1/2 cup vanilla almond milk or skim milk
1/4 cup chocolate frozen yogurt
8 ice cubes
Reddi-Wip topping

What you do:
In a tall glass, combine cocoa mix, powdered creamer, and chocolate chips. Add 2 tbsp. very hot water and stir until mostly dissolved. Thoroughly stir in food coloring if desired.

Pour mixture to a blender. Add milk, frozen yogurt, and ice. Blend at high speed until smooth.

Pour into the tall glass, top with Reddi-wip and additional mini chocolate chips.


  Recipe adapted from:Hungry Girl

Tuesday, July 3, 2012

4th of July Nails

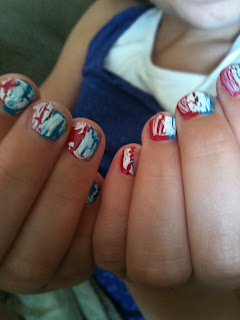
I've been extremely busy between work, kids, summer, etc so I haven't had much time to post lately but thought I'd share our 4th of July nails.  We love going all out for the holidays in my family right down to our nails. 


 What I did was paint a red stripe, white stripe and blue stripe and while the polish was still wet I took a toothpick to create a zig zag through my nail. Now you could leave that as is but I decided to put a coat of silver and blue glitter polish over it. I actually preferred it without the glitter but didn't feel like redoing the nail. 


I did my daughters nails using this technique with red and blue polish and used the white shatter.
I didn't feel the white shatter turned out quite as nice as the black but she was happy and that's all the matters right?


If we have the time my daughter wants me to do a post about her 4th of July hairdo we did.  So maybe look for that in the next few days!  Hope everyone has a happy and safe 4th of July!

Wednesday, June 20, 2012

I Drank the Kool-Aid


Well I succumbed to the peer pressure and read the 50 shades trilogy.  While it did take awhile for me to get "hooked" once I was there was no turning back. I did feel that it was the adult version of Twilight and was constantly waiting for Mr. Grey to out himself as being part of the Cullen family, but it was a great read nonetheless, and I'm am looking forward to the movie. I'd like to see how they're going to pull it off and be able to show it in the theaters versus having to buy it in a brick building along the interstate with the lit up XXX lights. I'm also curious to see who they're going to cast to play Christian and Ana (please movie gods not Robert Pattinson and/or Kristen Stewart)  If you haven't read it, I suggest you do.  It's a fun summer read.  Just remember it takes awhile to get hooked I was told about 100 pages into the first book and I think I'd have to agree.

Sunday, June 3, 2012

Meal Planning

Ever since I've lived on my own I've done weekly meal planning.  Actually, that's not true, there was a brief period where I didn't. Then my son's god mother introduced me to weekly meal planning and I haven't looked back since. As a matter of fact when I hear that people don't do it I think (no offense) surely there must be something wrong with their home keeping skills... and then I remember back to a day when I too was clueless.  For a long long time I've done this one way, but lately I've been changing it up a bit.

In this post I will show you a couple different ways I do meal planning and if you don't already do this, give it a try.

The original way or should I say the way I was taught was simple. I would sit down each week, and come up with a list of meals for each day and write them down.  I would write each night's dinner on the calendar for that week (i.e.  Monday- tacos, Tuesday- lasagna, etc, etc).  Then I would make my grocery shopping list according to what I needed for each meal. Then I was making just one weekly trip to the grocery store.  Easy. Peasy. This was nice because I knew exactly what I needed from the store and I knew what we were having for dinner each night.

This way works extremely well don't get me wrong but when you have an adorable 2 year old little boy who's not real fond of grocery shopping you have to find a way to make something easy even easier.  So I came up with this:

This way takes a little more prep time but so worth it in the long run specially if you have little ones who don't exactly make grocery shopping a fun time.

I now make menus out for 2 or 3 week stretches.  You could probably go for a whole month, but you will need to go again in about 2 weeks for fresh produce and such. So 2 weeks is what really works best for me.

So if I'm planning meals for 2 weeks I write down 14 different dinner ideas, complete with sides. Then I write down 2 weeks worth of breakfasts and lunch ideas.  I then go through my meals and make my grocery list based on what I just wrote down (checking my list against what I already have  my pantry so I don't end up with 10 boxes of spaghetti noodles!)


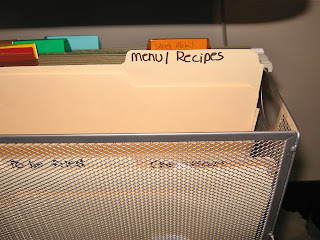
I keep this list in my file I have on my counter top and each day I look at the list and pick out what I feel like making from the list.  After I make a dinner I check the meal off the list so I know it's been made. (yes you could forget you made something over a two week period and I keep the list so I don't forget what all I had planned to make)


I also keep all my recipes for the dishes I'm making for that week or 2 in that file folder so I'm not trying to hunt them down each night before making dinner.  Once I make a dish the recipe comes out of the folder and goes back into my recipe box, folder, or book.

Now sometimes I do get lazy because planning 2 or 3 weeks worth of meals isn't always easy or my idea of a fun time so I'll only do a menu for one week. I do it exactly the same as for my 2 weeks only instead of coming up with 14 dinners I'll come up with 7. 


Also if you notice I have letters under breakfast and lunch. These are our initials.  Since we all tend to eat different things for breakfast and lunch it's just easier for me to list those out this way.  I also have a spot at the bottom where I list any dessert or special snacky type thing I might wanna make that week.

If you don't already do menu planning give it a try.  I'm sure one of these ways could work for you.  It will save you time, money, and your sanity at the grocery store and help end the "What am I gonna make for dinner?!" panic.

Wednesday, May 16, 2012

Things I'm Loving

Things around my house have been crazy busy lately. But that's a good thing.  As I have a spare minute I figured I'd share are a few things that I've been loving lately...


Taste of Home Mobile App
I've had a subscription to the Taste of Home magazine for as long as I can remember.  Love love love the magazine.  Their recipes are wonderful and I can make any of them for the first time and serve them to guests and not have to worry that they won't taste good.  So of course when I found out they had an app I had to get it! They have about a dozen or so recipes in each "collection" and they add new collections every so often. Usually around a holiday. It's really nice if your having a hard time of thinking something to make and it offers a lot of nice seasonal options!


Smoothie Cup
So, I'm not sure that it's actually called a smoothie cup but when I look at it that's what I think so smoothie cup it is! Anyways, I picked this up at Kohl's but I'm sure you could find them anywhere. Awhile back I got into making these Green Smoothies and I just LOVE them. I drink them about 3 times a week and recently started putting them in this so I could drink them on my way to work or on the way to dropping the kids off at school.


 This Picture
I took this picture of the hubs and my youngest on Mother's Day. I just love it.


*Disclaimer: I have not been paid or compensated otherwise to write this. These are my honest thoughts and opinions about the products and wanted to share them with you because I enjoy them and think you would too.


Monday, May 7, 2012

What's for L?

One thing I look forward to when I actually work my real job is LUNCH!!  Doesn't take much to please me... No, but really when I'm home with the kiddos I may not always have the time for a real HEALTHY adult lunch.  My intentions are always good to eat something healthy but sometimes it just doesn't pan out that way.  When I work I know I have to preplan my lunch for the week or else I starve :) So I  will make a big batch of something or other that's loaded with veggies and other good for you things for me to eat throughout the week. And yes sometimes I do this when I'm home too, but being home can make me lazy because I think oh I'll be home I'll just make whatever at lunchtime.... and that kinda thinking gets me into trouble and has me eating hot dogs and macaroni and cheese for lunch . BLEH.

Anyways one dish I do like to make when I'm home because it's so easy and quick to throw together at lunchtime is this broccoli salad.

All you need is:
Broccoli
Cherry Tomatoes (halved)
Carrots (cut into bite sized pcs of whatever shape your little heart desires - sticks, coins, etc)
Cottage Cheese (I use lowfat 2%)

All you do:
Throw desired amounts of veggies in bowl and toss with 1/2 cup of cottage cheese.


ah...YUM!


Tuesday, May 1, 2012

Double Dare Squares

When we first moved into our house we had the pleasure of living next to some of the greatest neighbors one could ever imagine living next to.  It was an older couple, both retired from the medical field, and parents of 6!  Not too shabby when you're raising little ones of your own to have some experts right next door hey?! They had hearts of gold and were always welcoming our family into their home, sending over leftover desserts, helping out if we needed a hand, just all around great people.  They were also great for conversation!

They have since moved down south but before they did, they left us with some wonderful memories and this wonderful recipe too!
 
The husband made these for us once and my oldest begged us to get the recipe from him. They are called Double Dare Squares, and I'm not sure why except perhaps because I double dare you to only eat one square??? Trust me, it'd be nothing to finish off a pan of these bad boys...

I changed the recipe just a touch.

Double Dare Squares

What you need:
2 cups (12oz pkg) semi-sweet chocolate chips
9 cups (16oz pkg) mini marshmallows (or the majority of the bag if you have a 2 year old that needs a few handfuls of 'smarshmallows' before you get to making these)
1/2 cup peanut butter (I use creamy)
1-1/3 cup rice krispies (the original recipe calls for 1-1½ cups roasted peanuts)

What you do:
Lightly grease 13x9 baking dish.
In LARGE sauce pan over low heat melt chocolate chips and peanut butter stirring constantly.
Allow to cool 5 minutes.
Gently stir in marshmallows and rice krispies (or peanuts).
Pour into pan, refrigerate 30 minutes or until firm.
Cut into squares
Try not to eat them all in one sitting.


YUMMMMM!!!

Monday, April 30, 2012

The GREEN post

Green... weird how one word can take on so many different meanings... color, young, jealous, earth friendly, money...

Green Breakfast
Spinach for breakfast? Sounds inviting right?  Ya didn't think so. I had a hard time just pulling the bag of spinach out of the fridge before 8am until I tried this super yummy but extremely healthy drink.  Even those who don't like spinach will like this because well, you can't taste the spinach but you will reap the benefits of eating it! Sounds like a win win to me.

 Gather your ingredients

Combine in blender until smooth

Enjoy

Green Smoothie Recipe
1 banana (previously peeled, sliced and frozen)
1 spoonful of peanut butter
1 cup of almond milk (you could use regular milk but why not up the health benefits with the almond milk?)
1 single serving container of vanilla Greek yogurt (once again you could use regular yogurt but why not make it more healthy?)
2 handfuls of spinach

Put all ingredients in blender in order they are listed and blend until smooth.

Original recipe found at:Iowa Girl Eats


Green Nail Polish
Seeing as mint nail polish seems to be one of the in colors this season I figured I'd give it a try.  Since I wasn't quite sure I was going to like it I just picked one of the cheap-os up at Target.  I got the Sally Hansen Extreme Wear in Mint Sorbet. I painted my fingers and toes.... While I'm not an overall fan of this particular brand of nail polish (it's thick and clumpy) the end result isn't too bad. 


While I didn't love it when I first applied it, I must say after a day or so. It's starting to grow on me.  It definitely won't be my go to color but I think it will make it into the rotation of a fun spring/summer color.


Green Cleaning

As I mentioned in a previous post about vinegar, I would like to start cleaning my house with more earth friendly products.  I have since then started to switch over to homemade 'green' cleaners and I must say the switch has been a lot easier then I thought it would be.  As a matter of fact over the weekend I cleaned with my store bought 'chemical' cleaners and I didn't realize how much I prefer the homemade ones.  Here's the recipe for the glass cleaner that I'm loving!

Glass Cleaner
¼-1/2 teaspoon liquid detergent (I use Mrs Meyer's dish soap in the basil scent seriously this must be the best smell on earth as far as clean goes)
3 tablespoons vinegar
2 cups water
Spray bottle

Put all the ingredients into a spray bottle, shake it up a bit, and use as you would a commercial brand. The soap in this recipe is important. It cuts the wax residue from the commercial brands you might have used in the past.

At first I found this recipe to be too "wet" and I thought oh no that's going to streak my mirrors right up. In fact it does the opposite.

Also, try using newspaper instead of a paper towel to clean windows and mirrors... Much better results! No matter what cleaner you are using.


Green with Envy
My brother and sister in law moved into their new house this past week and I must I am green with envy of how much space they now have... Mostly all the closet space! Congratulations on the new house!! It's beee u tiful!


Thursday, April 26, 2012

The Condiment Kid

Now that the 2 year old  lovely darling of mine has discovered you can add "stuff" to your food he's all over it.  It started out innocent enough as most things do when you're 2. A little syrup with your pancakes, Parmesan on your pizza, ranchup (my daughter's famous ketchup and ranch dressing mixture) on your fries. All normal things. 

Well now the child can't sit down to eat without putting something on his food. And apparently it really doesn't matter what. The other day he insisted on having Parmesan on his scrambled eggs (which wasn't exactly awful) and last night he wanted to put ketchup on his pizza (we convinced him Paremesan would be the better option here).  I can only wonder what he'll wanna try for today. But, I guess when you have some picky eaters in the house as long as the kid's eating who really cares right??

Wednesday, April 18, 2012

Homemade Finger Paint

What's more fun than finger painting? Not much if you're 2. I mean how awesome to color with your hands and make a mess at the same time. And...... it's super easy to make your own and if your little one tries to eat this, it won't hurt them.  Not that I would encourage the eating of finger paint but if they try and taste it no need to freak! I found this in an old cookbook of mine.

Gather your supplies (you probably already have all of these in your kitchen)
3 Tablespoons Sugar
1/2 Teaspoon Salt
1/2 Cup of Cornstarch
2 Cups of Water
Food Coloring (not shown...oops)


Mix together in small saucepan over a low heat until thickened.
Stirring frequently. Mine took about 15 minutes.


Let the mixture cool and pour into desired containers.
I used old baby food jars.


Add food coloring to each jar.  I used the Neon ones because neon makes things much more fun right?  I actually screwed up 2 of the colors though. The purple and pink caps looked fairly similar to me and this is why I have 2 purples and the brown color was supposed to be apricot, but I figured they are going to need a brown to make trees.


Let your little ones go to town!


This finger paint I felt was a little bit thick, but it actually seemed to work better for a 2 year old then the traditional finger paint.  But I would imagine if you add a little more water you could thin it out if you wanted.


Monday, April 16, 2012

An alternative to the refridgerator door

My daughter loves to color pictures. She fills up our refrigerator door and then some. And when you have a 2 year old in the house the refrigerator door isn't always the best place to hang artwork.  He sees something colorful and he yanks it down, crumbles it up, kicks it around.  Enter 7 year old MELTDOWN.  Sometimes I think he does it cuz he knows he's making her mad, yea he's rowdy like that :)

I was trying to come up with another way we could display her masterpieces when I noticed a classroom at her school had a "clothesline" running across the room and all the students' artwork was hung on it to dry...... LIGHT BULB!!

I hung some fishing line on her wall and we painted clothespins to display her work.


Now all of we can hang many more pictures, it's outta her little brother's reach and it decorates her wall a little.  We're also able to hang more of the bigger pictures she makes that wouldn't necessarily fit on the fridge.

Wednesday, April 11, 2012

Behold the power of Vinegar


I may be a little late to the whole green cleaning world, but I have been thinking of making the switch for awhile now and after all it's the thought that counts right?

I really like the idea of cleaning the house without all the harmful chemicals but in my mind it's those harmful chemicals that I feel get my house clean.  But after doing some research over the past few months I think I'm ready to take baby steps into the green world of cleaning.  Now, I can't quit all the traditional cleaning products cold turkey and I may not ever be able to give up certain ones... We'll see. However, I am going to try out some "natural" products and ways to clean and hopefully I can make my cleaning routine a little bit better for my family, the environment, and my pocketbook. 

I'm finding vinegar can be used to clean just about anything.  I recently started using it in place of my fabric softener.  When I first heard about this I was a bit, ah yea not gonna walk around smelling like a jar of pickles, but I was assured once my clothes were dry they would not smell like vinegar. I was intrigued, but not convinced. So I figured I would first try it out on my sheets and towels because if in fact they did smell I could just rewash them quick (cuz you know a load of clothes would be so much more difficult to rewash them some sheets or towels).

Anyways... I washed four beds worth of sheets and blankets, and a house full of towels and NONE I repeat NONE came out smelling like vinegar!!

I add  ½ cup to 1 cup of white vinegar to the fabric softener dispenser of my washing machine.  If you don't have one just add it to your rinse cycle or you could get a downy ball and put it in that.  The vinegar will deodorize, soften clothes, and prevent static cling.

Vinegar is a lot cheaper than traditional fabric softeners and you won't be using all those harmful chemicals.  My family also deals with sensitive skin issues, my daughter especially, so I can't really use any fabric softener on her clothes anyways so this works wonders for her stuff.

Now there are some other "recipes" for natural fabric softeners that I may try out, but for now I'm liking the plain vinegar.

*Make sure you do NOT use bleach and vinegar together as this is a very unsafe combination. You shouldn't really mix bleach with anything except water.

Do you do any "green" cleaning?

Tuesday, April 10, 2012

Chocolate Eclair Squares


My favorite type of dessert to make (and eat) is a trifle. They're so easy. And while this is not a trifle per se, it is layered dessert which makes it just as easy.  The hardest part is waiting the 4 hours for it to set up!

What you will need:
2 pkg. (3.4 oz. each) Vanilla Flavor Instant Pudding (I use sugar free)

2 cups cold milk (I use skim)

1 tub (8 oz.) Whipped Topping, thawed (I use lite)

64 NILLA Wafers

2 squares Semi-Sweet Chocolate
What you will do:
Beat pudding mixes and milk in large bowl with whisk 2 min. Stir in whipped topping. Arrange 16 wafers on bottom of 8-inch square dish; cover with 1/3 of the pudding mixture. Repeat layers twice. Top with remaining wafers. Refrigerate 4 hours.
Microwave chocolate in microwaveable bowl on HIGH 1 min. or until melted when stirred. Drizzle over dessert. Store in refrigerator.

Source: Kraft Foods

On a side note I finished the first book of the Hunger Games over the weekend and am waiting very impatiently to start the second.  Christian forgot it at school. Ugh.  But on the upside my bff and I are going to see the movie tonight!! 

Thursday, April 5, 2012

Stretch your beauty dollars a little farther

I am a product junkie, and most of the time I can not wait to finish a product so I can try another.   However, there are my holy grail products that when they get down to the end I panic if I don't have another one standing by. I would try so hard to get every little drop out of the bottle and then I discovered this trick and couldn't believe how much product was still in the tube. It's usually at least a few more days worth.  Now this won't work for all products, only those that come in tubes.

 This works for products in tubes like this. 
(This product is one of my favorite hair products by the way)


 Cut the tube in half.
You can now scoop out remaining product.


 To store push bottom half into the top half


This tube fit together nicely so I left it like this. If I have a tube where I feel air will
get in and dry out the product I will then put it in a Ziploc bag.


Wednesday, April 4, 2012

Let the Games Begin


Today I started The Hunger Games.  I have went back and forth on whether or not I wanted to read these books.  Don't get me wrong, I love a good-hyped-up-can't-put-it-down-book, but my hearts been broken one too many times by a good book series end (Twilight, Harry Potter,etc).  Anyone who reads knows what I'm talking about. That empty what the heck am I going to do now feeling you get when you finish the last word of the last sentence of the last page of the last book.

Well, when all the hype started I was intrigued, but the more hype it got, the more I was thinking meh, maybe it's not for me. Then the movie came out, and of course I like to read a book before seeing the movie. Anyone with me on this? Then I thought oh who cares, just go see the movie. I mean people see movies all the time without reading the book first. Then, my son Christian started reading the books. Christian is not a reader.  At all.  He still tries to reuse book reports on books he's read 3 or 4 years ago. Christian.loves.the.books. He asked me to buy him the 2nd and 3rd book because he can't put them down. That made my mind up. I have to read these books. So today my journey in the Hunger Games begins... If they are as good as everyone claims, sorry family but you'll be fending for yourself til I'm done reading. :)

Have you read The Hunger Games?

Tuesday, April 3, 2012

Things I'm Loving Right Now

First of all today is my oldest son's birthday... 14.. I can't believe it.. Where does the time go? Happy Birthday Christian!

And now on to some things I've been loving lately.


Fresh Sugar Lip Treatment in Rose
I'll admit it, I'm not a huge fan of lipstick.  I mean, I do like the way it looks, and I do tend to leave the house with it on, but after it wears off that's the last of it for the day.  I'm just to lazy busy to keep applying throughout the day. And honestly I really don't care for how it feels. I'm sure this drives my mom insane considering the fact, that I'm pretty sure she (and probably my grandma too) came out of the womb with freshly applied lipstick.

I do however love me some chapstick. I like the way it feels better than lipstick and I like the fact that you don't need a mirror to apply it.  However, sometimes a girl needs a little color on her lips... and I've tried the tinted lip balms before and they all leave me looking like I've had one too many cherry koolaids. 


Lately, I've been using the Fresh Sugar Lip Treatment in Rose. O.M.G. am I in love. This stuff is amazing! It feels just like a chapstick. Has a SPF of 15 AND adds the most perfect tint to your lips.


Tazo Zen Green Tea
I love green tea   I have been drinking it for years, because I like the taste.  Now throw in the research that is showing all the health benefits that come with drinking it. BONUS!  I like all green teas, but this is by far my favorite.

Pampered Chef Pizza Grill Pan
Pizza on the grill...Need I say more? 

Have you tried any of these products?


*Disclaimer: I have not been paid or compensated otherwise to write this. These are my honest thoughts and opinions about the products and wanted to share them with you because I enjoy them and think you would too.

Monday, March 26, 2012

First name basis

My sweet little two year old boy and I got a little closer last night.  See now we are on a first name basis... He's takin to calling me Courtney.

I'll set the scene for you... You're a little preoccupied by something and your selective hearing has kicked in. Your precious little boy calls for you "Mom".  Since you don't hear any urgency in his voice, it becomes white noise to you so you can just finish what you are doing (admit it, we have all done this).

And then...

instead him calling out "Mom" it's COURTNEY!!

Ay-yi-yi
I hope this doesn't become a trend.

Sunday, March 25, 2012

Poppy Seed Chicken

Since the weather is starting to warm up, I figured I'd better get my need for "cold weathered" comfort foods outta my system now.  This casserole is so easy and quick to put together.  You could also, double the recipe, make up two and bake one now and throw one in the freezer for another time.


Poppy Seed Chicken Casserole

What you will need:
4 boneless, skinless chicken breasts, cooked and cubed
1 cup (8oz) sour cream (I usually use low fat)
2 cans of cream of chicken soup (I usually use the 98% fat free one by Campbell's)
1 stick of butter, melted
55 Ritz crackers, crushed (put in a Big Ziploc bag and roll out with your rolling pin)
1 TBSP poppy seeds

What you will do:
Preheat oven to 350°.

Combine butter, crackers, and poppy seeds.  Put half of the mixture in the bottom of a greased casserole dish (the one I use is 2½ qts).

Combine chicken, sour cream and soup.  Spread on top of cracker mixture.

Sprinkle remaining cracker mixture on top.  Cook at 350° for an hour.

Source: Unknown

Monday, March 19, 2012

Pony-Os

Are you a sucker for cute hair ties? Pony-Os are easy to make at home.  All you need is some ribbon and a few other tools you probably already have around the house.  Below I will show you how I make mine.

Gather your supplies. 
 You will need:
An assortment of ribbon  (I used about 7 different kinds for mine)
tape measure
hot glue gun
wire cutters
lighter and/or clear nail polish
scissors
elastic hair ties
zip strips

First begin by cutting your ribbon. I cut mine to 12".
(Remember they will be folded in half so they will only hang half the length that you cut in your hair)

Next trim the ends.
(You don't have do to this, but I think it looks nicer)

Heat treat the ends. 
(You can use clear nail polish for ribbon that can't be heat treated)

 Lay your widest ribbon straight across and apply a small dot of hot glue to the center. Start gluing your ribbon in a cross pattern
 

Gather your ribbons in center and wrap a zip strip around the ribbon and elastic hair tie


Pull the zip strip as tight as you can

 Using wire cutters, trim off the tail of the zip strip
 

Choose one of your wider ribbons and cut to 5½ inches

Tie a knot in the center

 Hot glue the "knot" onto the square part of the zip strip.
Hot glue the ends of the ribbon around the rest of the zip strip to hide it. 
Trim off any excess ribbon. 
(Sorry I don't have better pictures of this step, it was hard to get a good shot of it)


 Your finished Pony-O!